Configure build settings
In this section, we will configure a few settings for your AWS App Runner service.
Configure Deployment Settings
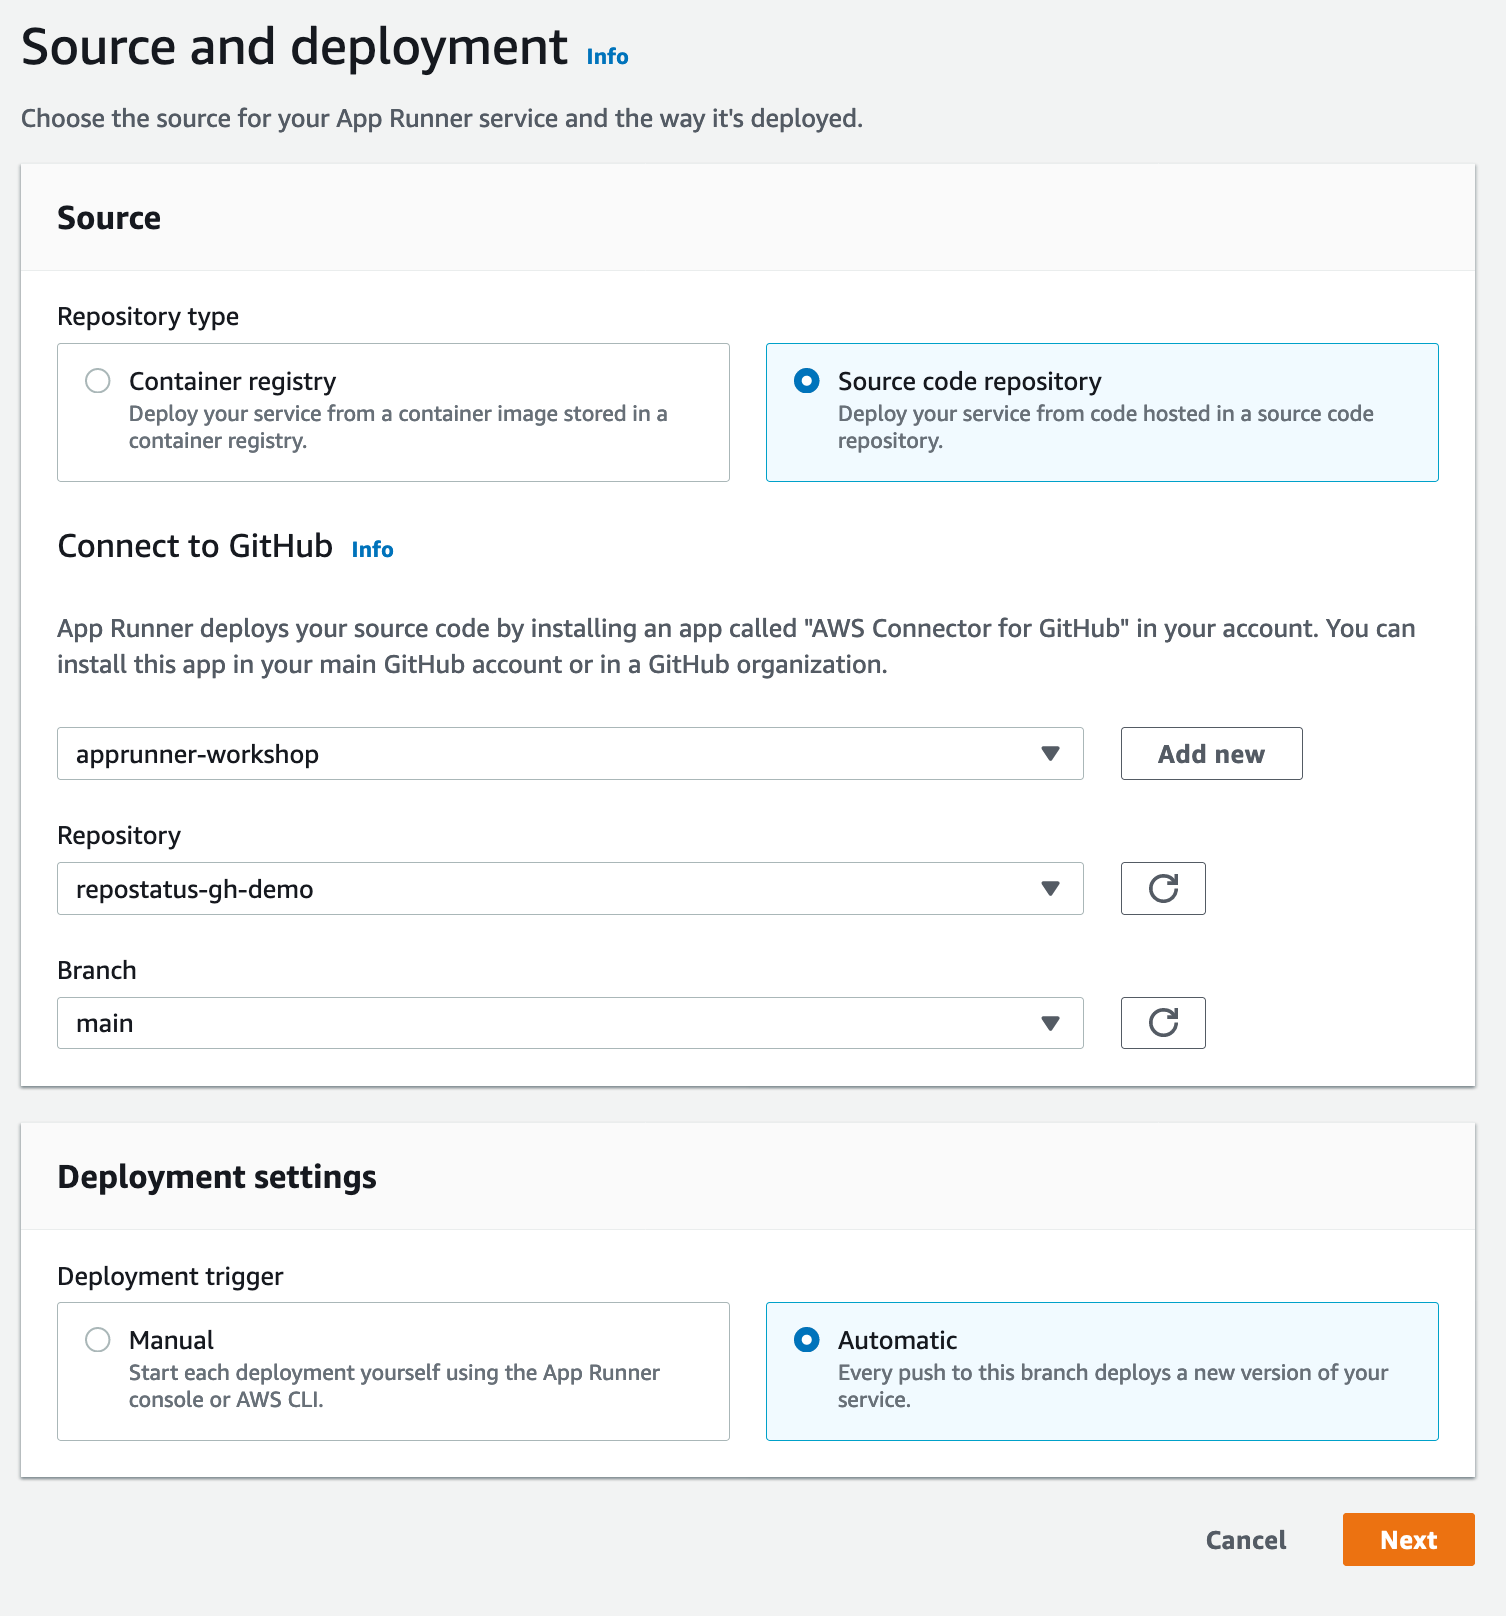
In the Deployment Settings -> Deployment trigger, select “Automatic”, so that AWS App Runner
automatically newly introduced code changes from your main branch as defined above.
Click next.
Configure Build Settings
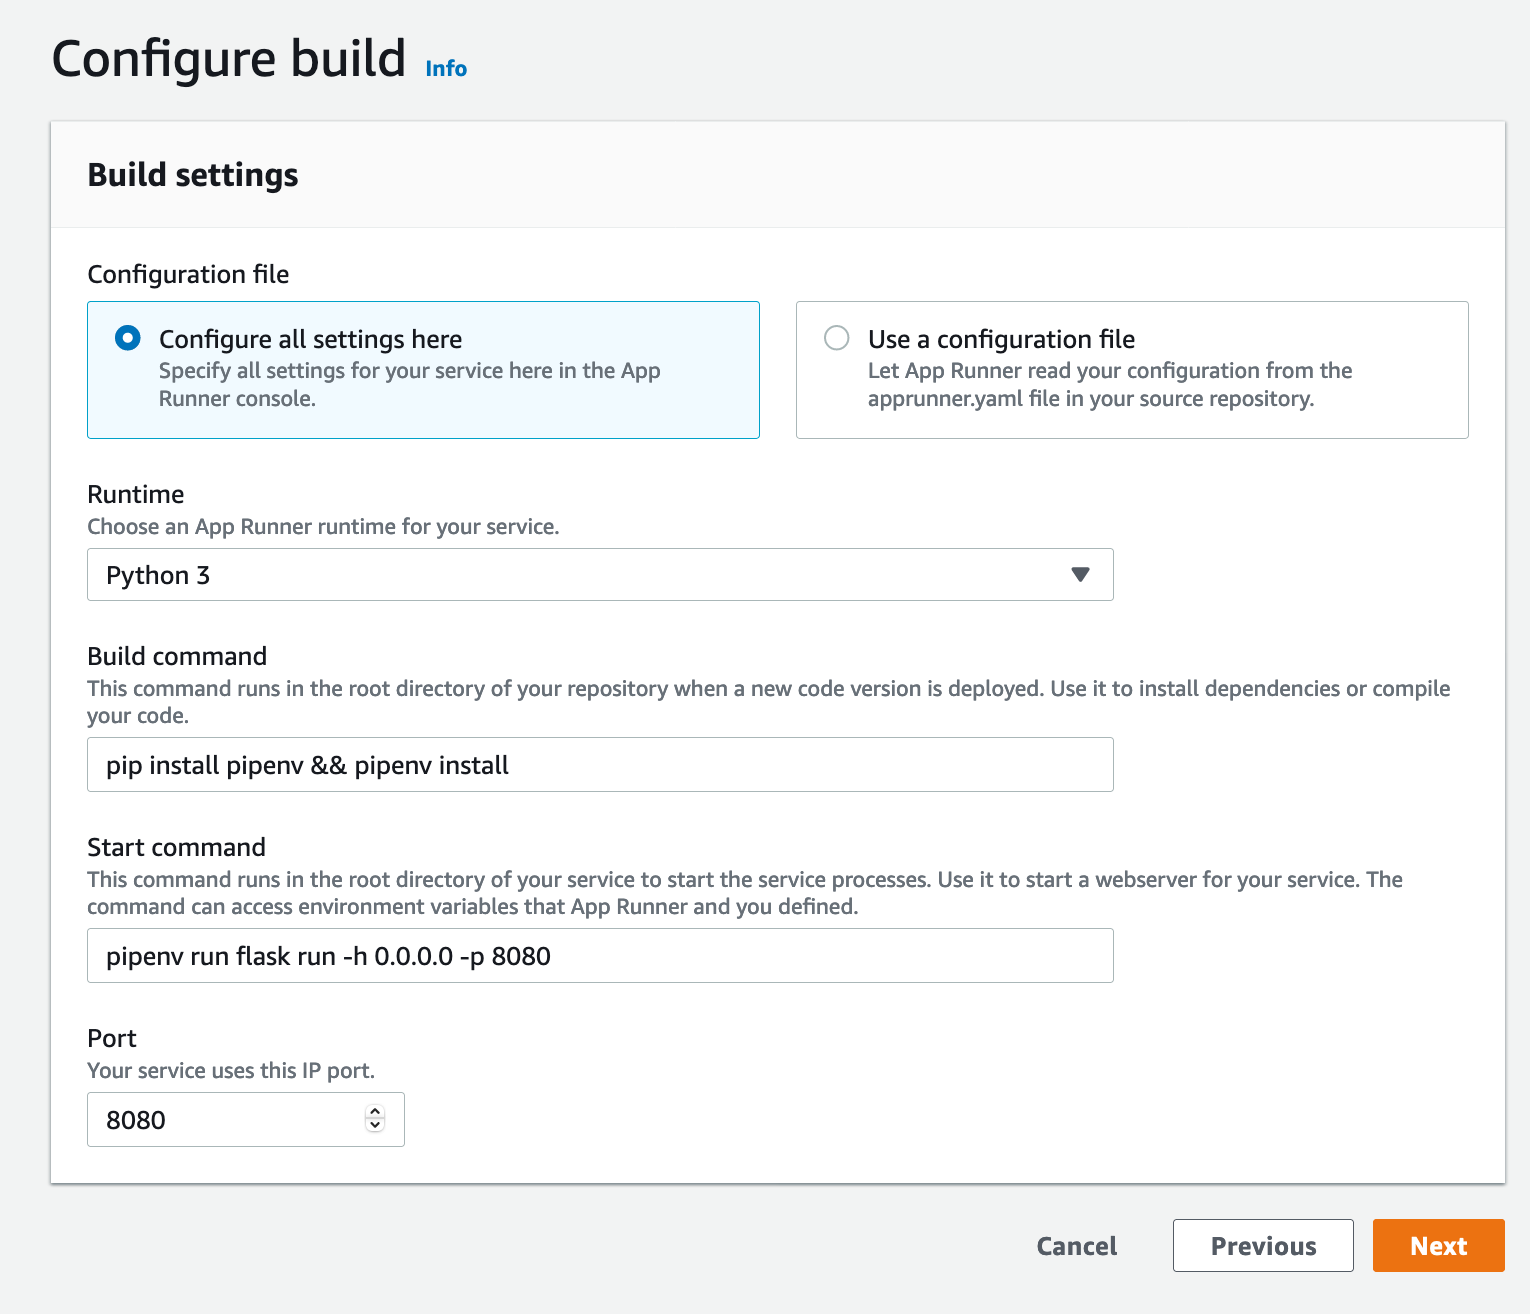
In this example, we are going to specify all the settings for our service manually. This is in order to show the control that AWS App Runner gives you. Later we will demonstrate giving these settings through a configuration file contained within your code repository.
Select “Configure all settings here”, then underneath Runtime select “Python 3” from the dropdown.
Under Build commend, enter pip install pipenv && pipenv install.
Under Start command, enter pipenv run flask run -h 0.0.0.0 -p 8080.
Under Port, enter 8080.
Select ‘Next’ to continue.
Configure service
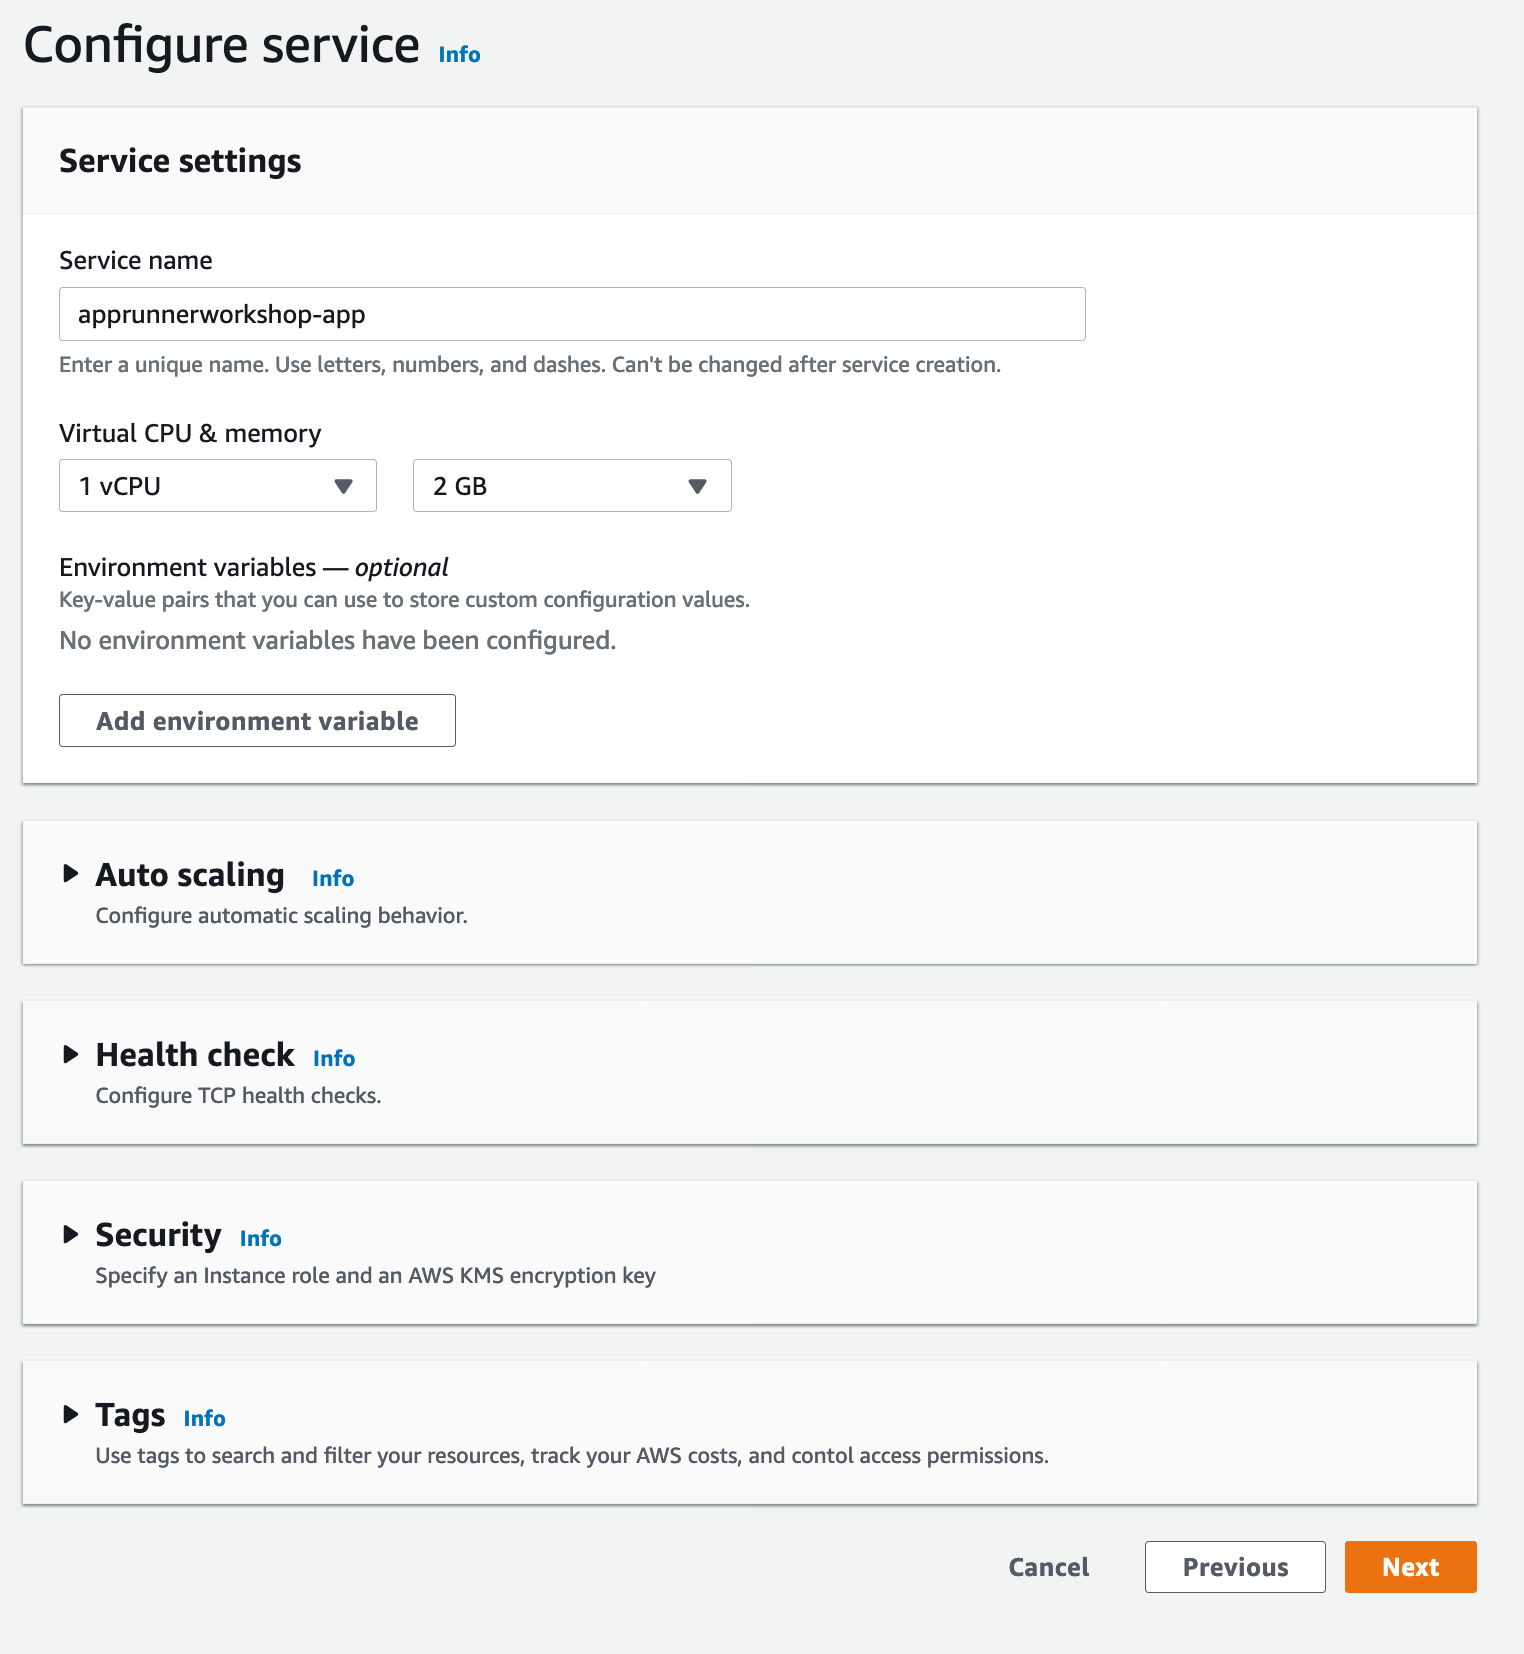
In this step we will give our new service a name - apprunnerworkshop-app.
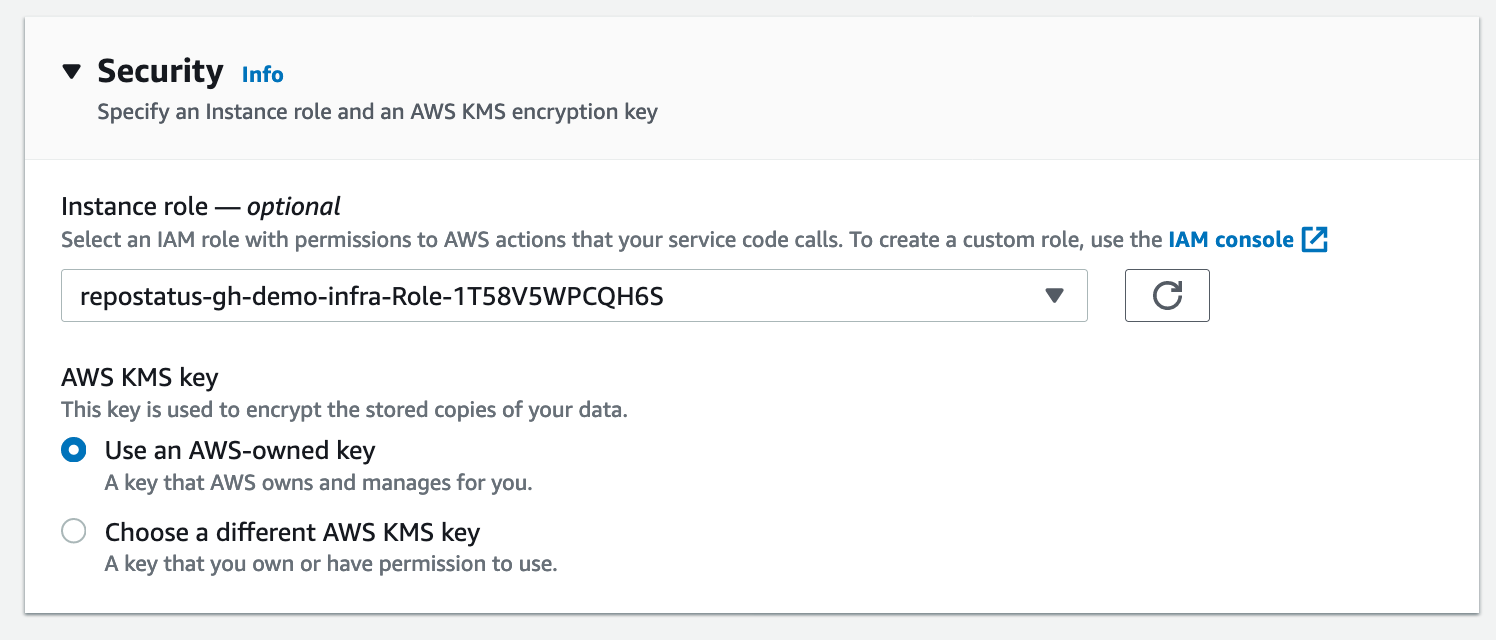
In the Security section, we are going to configure an Instance role to use, this will allow AWS App Runner to access the DynamoDB table we created in the pre-requisities section.
The value in the drop-down should match the output from the following command:
$ aws cloudformation describe-stacks --stack-name repostatus-gh-demo-infra --query 'Stacks[*].Outputs[?OutputKey==`RoleName`].OutputValue' --output text
repostatus-gh-demo-infra-Role-1T58V5WPCQH6S
Leave the rest of these settings as defaults. Select “Next” to continue.
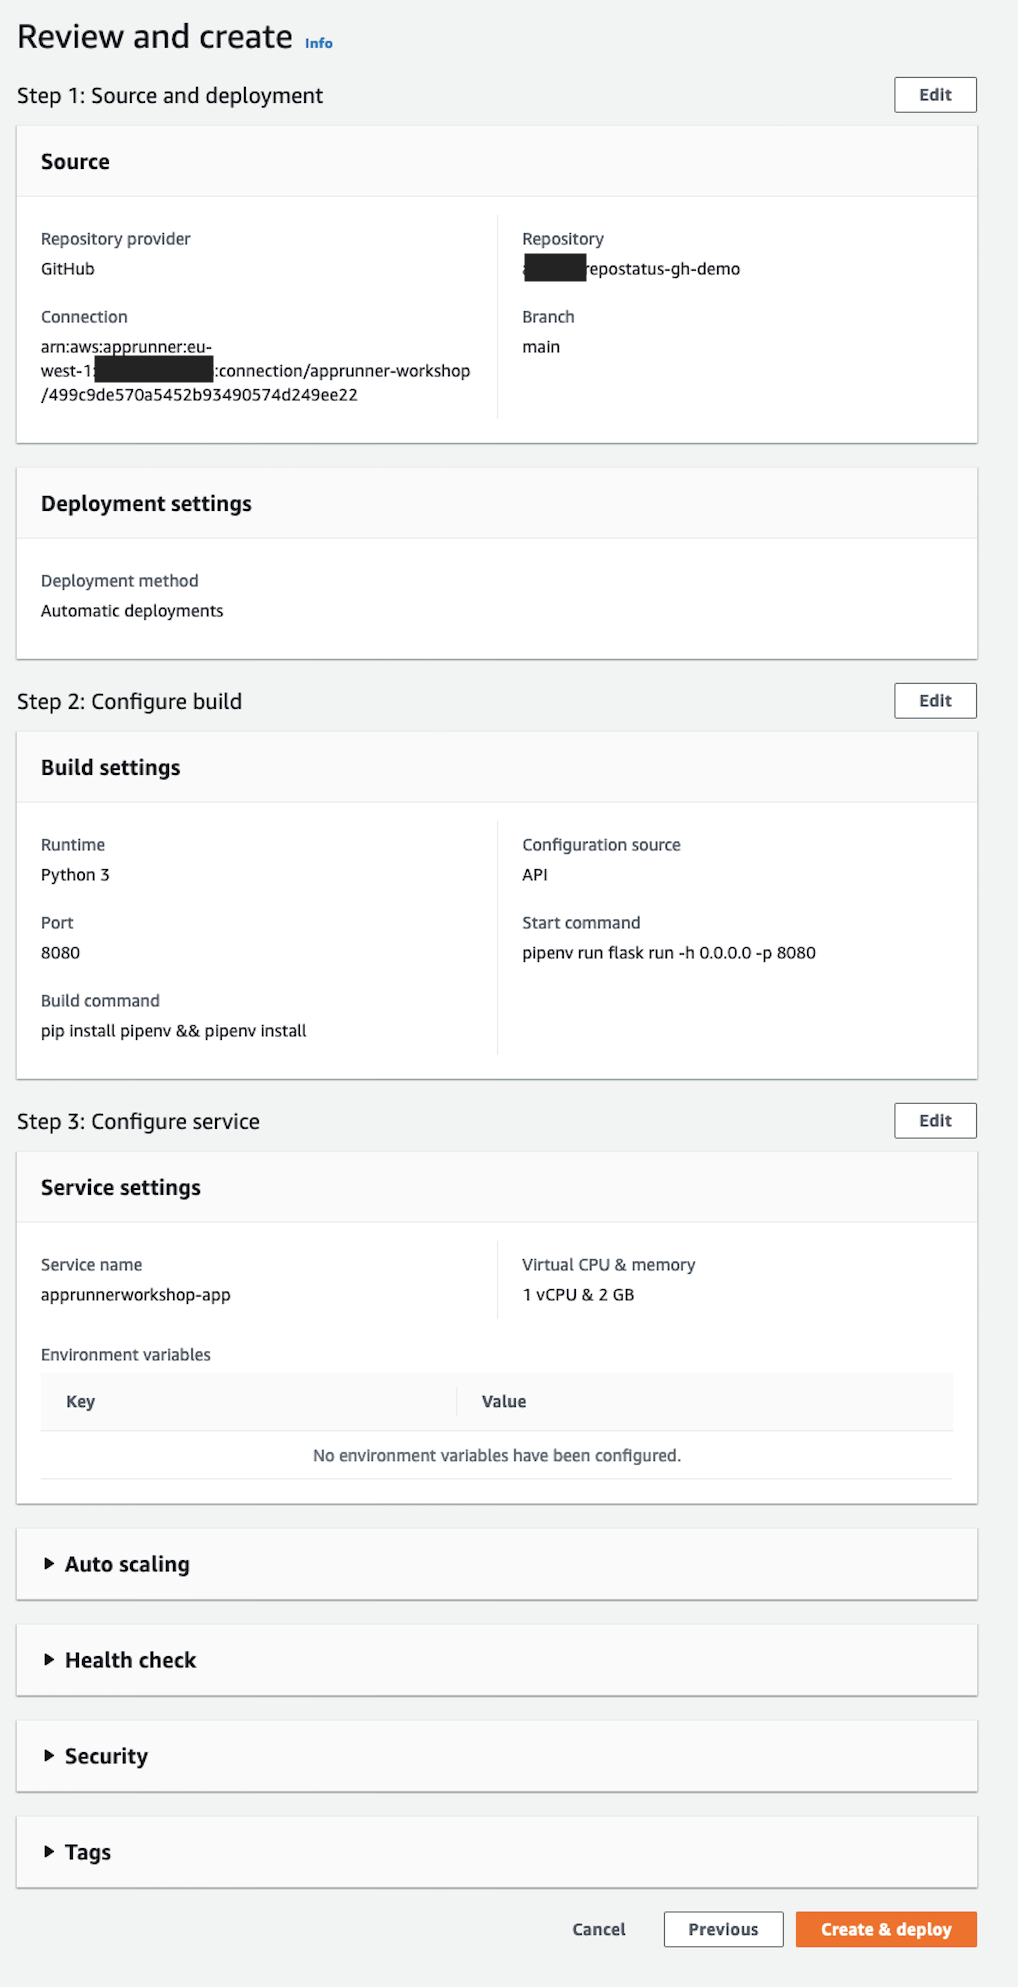
Finally, review your settings and select “Create & deploy”. This will take a few minutes.
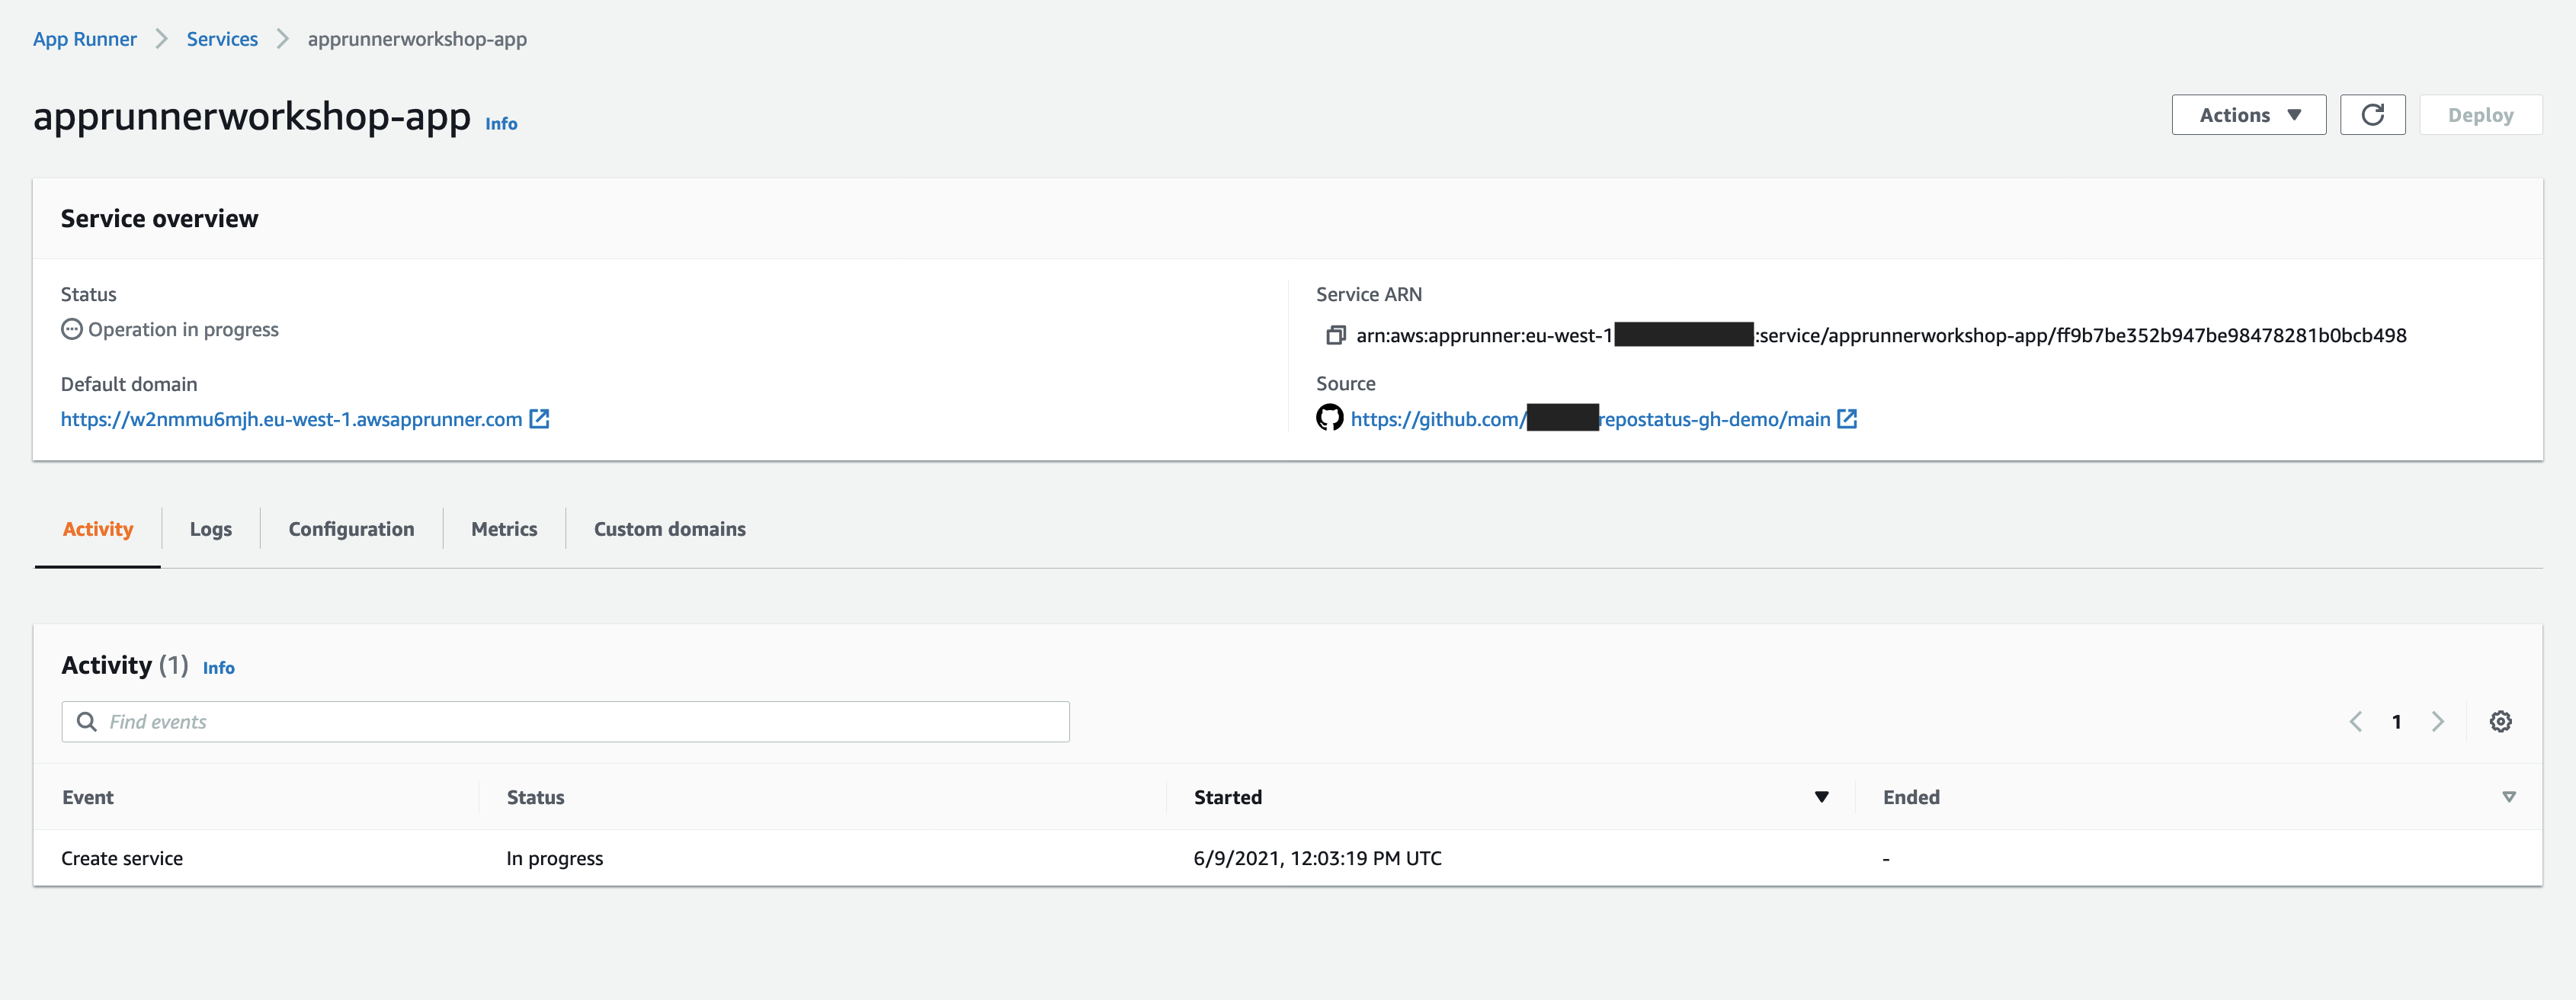
Test the app
Once status has moved to “Complete", you can click on the url listed below “Default domain” in order
to view the actual web application you have just deployed. The app will fetch general repository
info from the GitHub API for a slug you provide,
browse to https://[DOMAIN_HERE]/repo/[YOUR_GITHUB_USERNAME]/repostatus-gh-demo.
Congratulations, you have just deployed a simple web service using App Runner!