Create App Runner Service
Now it’s time to create our App Runner service, we have already built our image and configured IAM access.
Go to the AWS App Runner console and click Create an App Runner service.
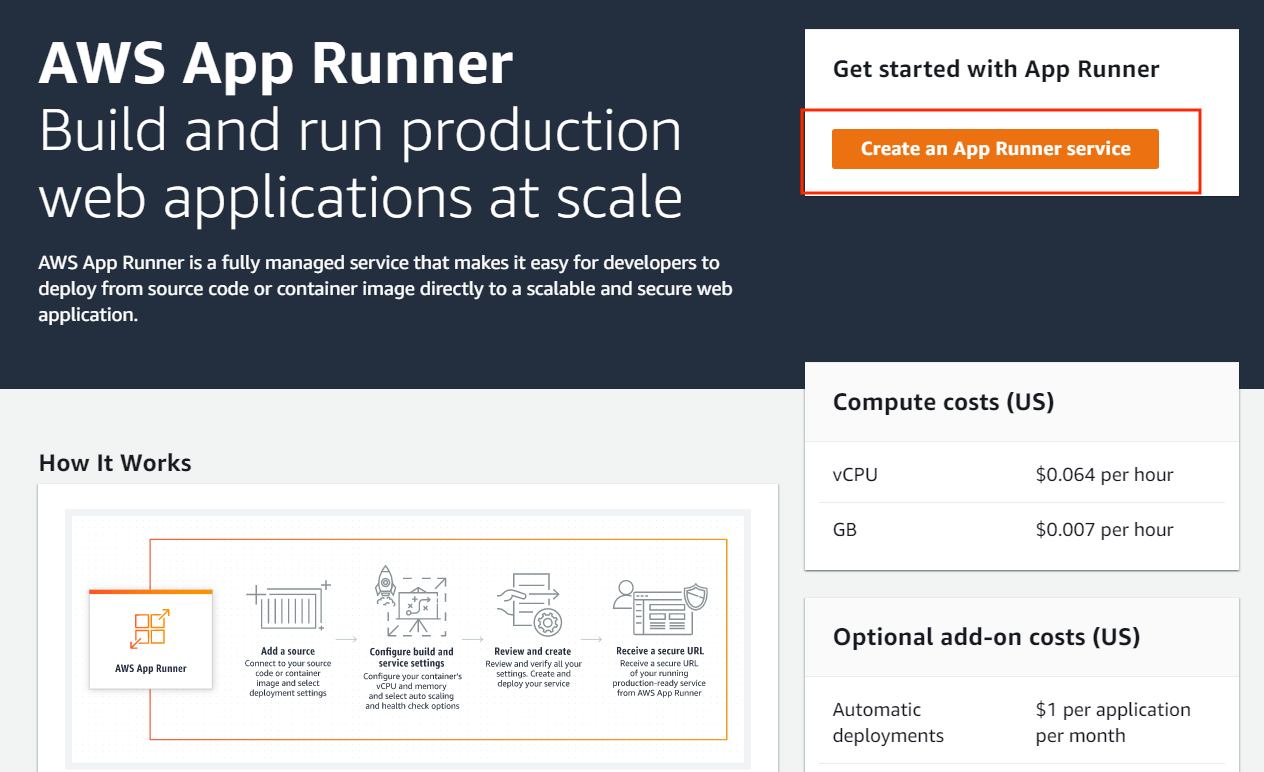
Configure source and deployment
For Repository type, select Container registry, and for Provider, select Amazon ECR, as we will be using the image we have previously built and pushed to our private ECR repository.
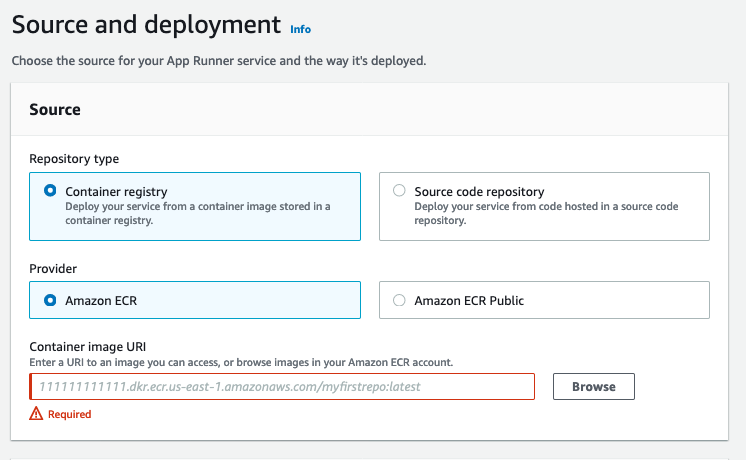
In the Container image URI input, enter the full URI for our image, you can get it by typing the following command in your terminal:
$ echo $ECR_REPOSITORY_URI:demo
1234567891012.dkr.ecr.eu-west-1.amazonaws.com/apprunnerworkshop-app:demo
In the Deployment settings section, select Automatic as the deployment trigger. And for ECR access role, select the role name we’ve previously created
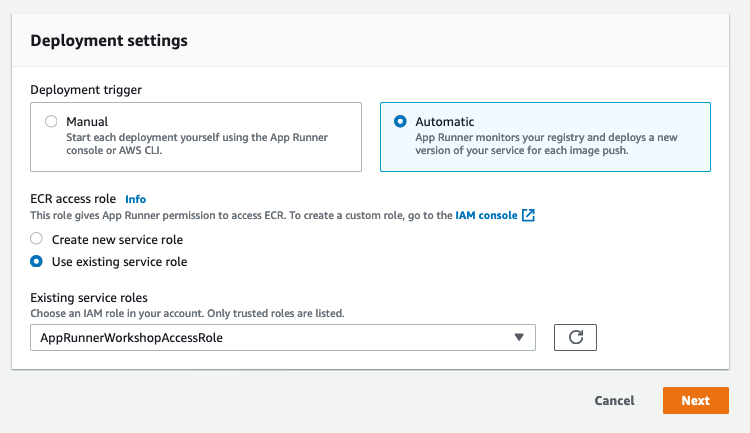
Then, click Next.
Configure Service
On the next page, we will configure our service, first, select a name for your service, enter
apprunnerworkshop-app, and leave the rest with default values
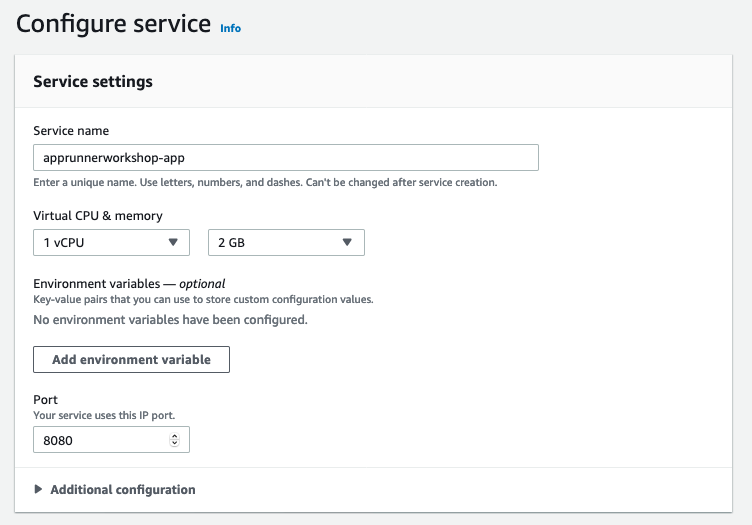
In the Security section, we are going to configure an Instance role to use, this will allow AWS App Runner to access the DynamoDB table we created in the pre-requisities section.
The value in the drop-down should match the output from the following command:
$ aws cloudformation describe-stacks --stack-name repostatus-gh-demo-infra --query 'Stacks[*].Outputs[?OutputKey==`RoleName`].OutputValue' --output text
repostatus-gh-demo-infra-Role-1T58V5WPCQH6S
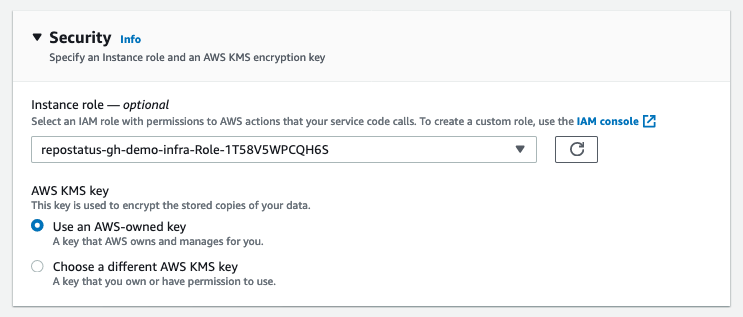
Go ahead and click Next.
Review & Deploy
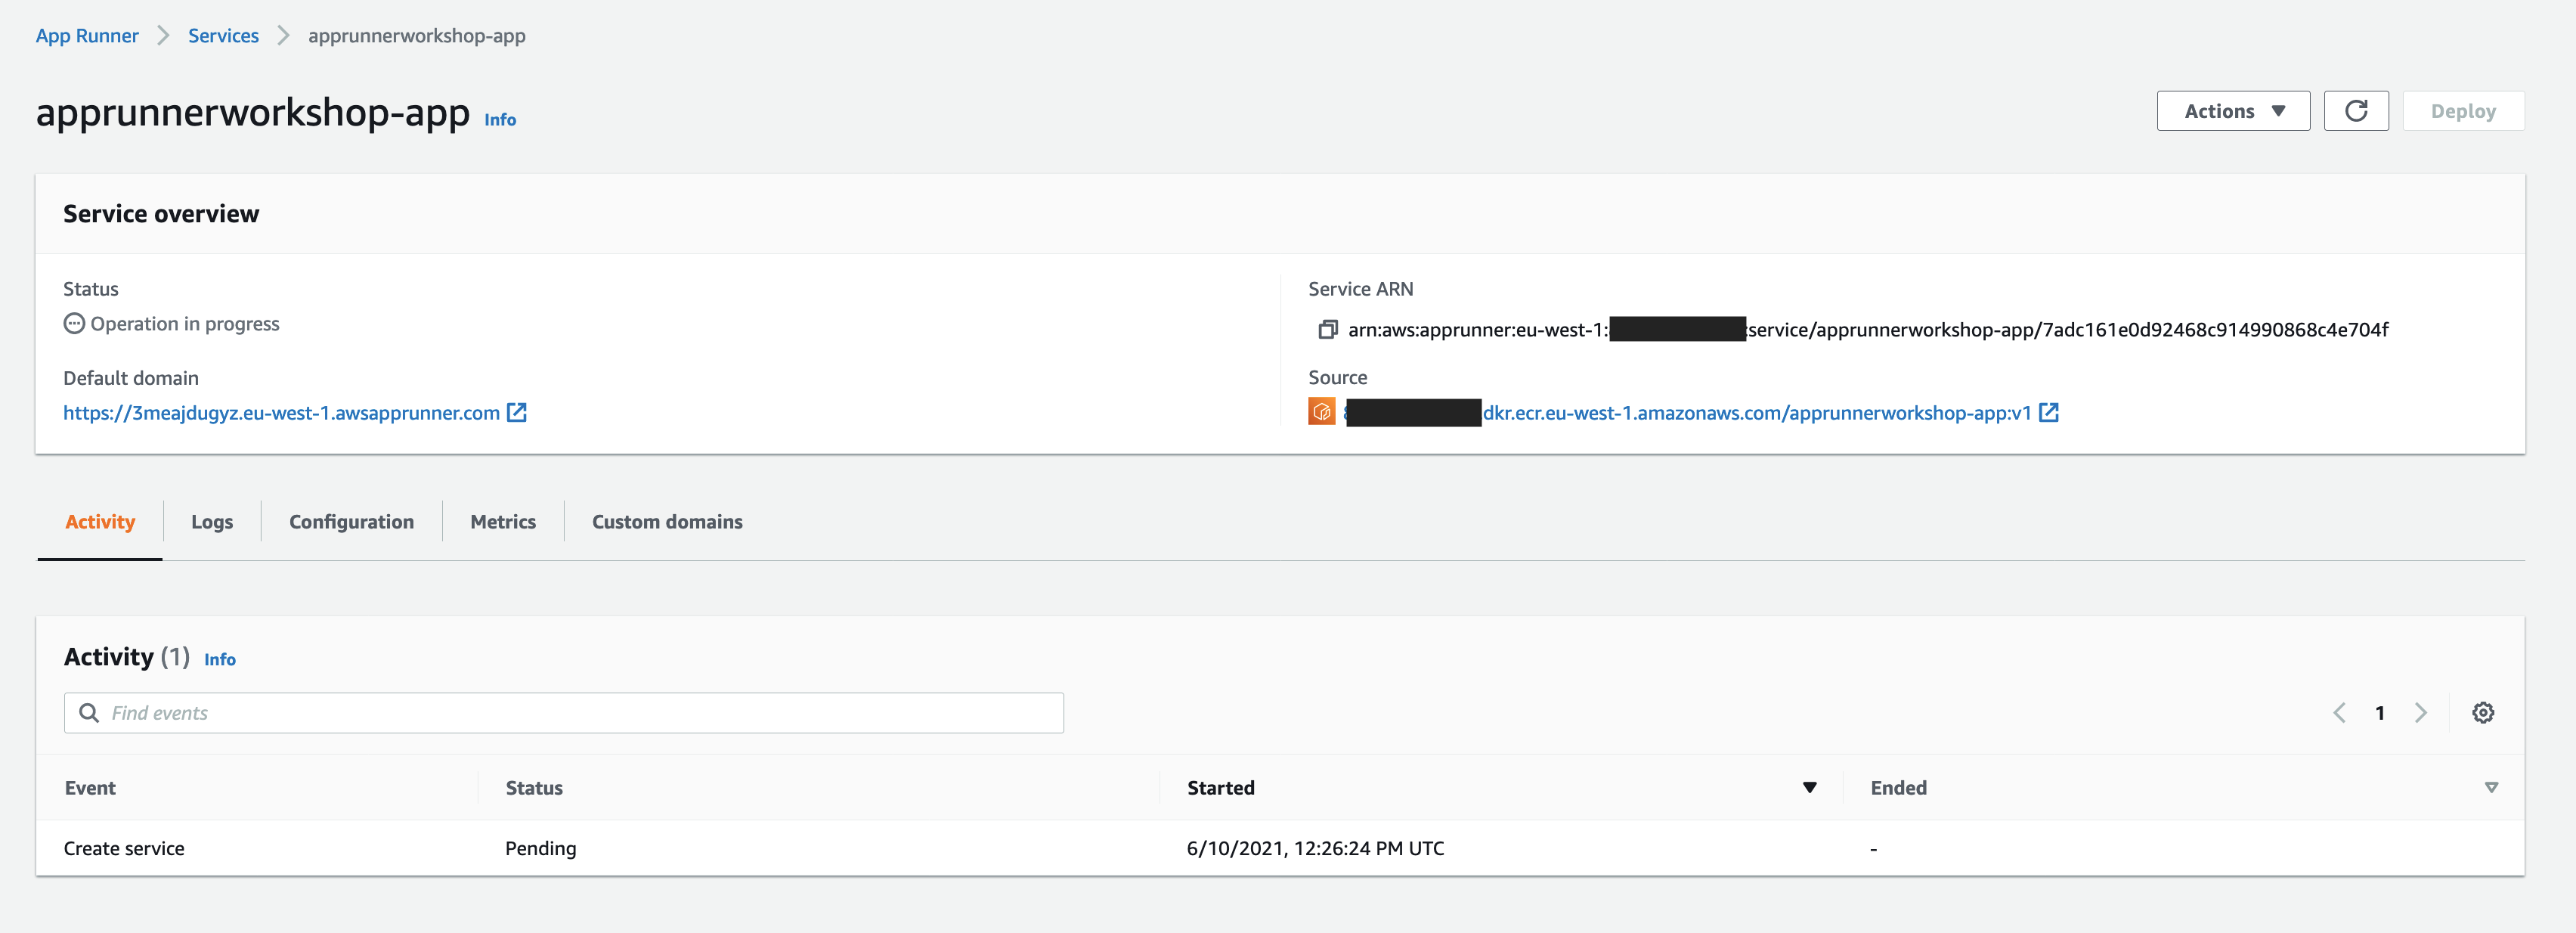
Review our settings, and if everything looks good, click Create & Deploy. This step will take a few minutes.
Test the app
Once status has moved to “Complete", you can click on the url listed below “Default domain” in order
to view the actual web application you have just deployed. The app will fetch general repository
info from the GitHub API for a slug you provide,
browse to https://[DOMAIN_HERE]/repo/[YOUR_GITHUB_USERNAME]/repostatus-gh-demo.
Congratulations, you have just deployed our demo application from a built container image using App Runner!